Two months, no blogs– what gives?? Well, here’s the story…
We recently received an unexpected inheritance from Jon’s grandfather, George, who died about a decade ago. George had wisely invested in Denver real estate way back when, and fortuitously, by waiting this long to sell his property, his three kids made a bunch of money, which they generously decided to share with all the grandkids, too. We wanted to honor this gift by investing it wisely, and, convinced by a very business-minded friend who owns two condos in Keystone, we decided to invest in a ski condo which we could manage as a vacation rental and also use ourselves.
Why Keystone? It’s close to Denver, we’ve enjoyed visiting there, and it is a little less pricey than some other ski areas, real-estate wise. I will say it felt surreal to be looking at ski condos that cost more than our actual home in Denver, but we felt pretty confident, thanks to our friend’s experience, that were making a good choice.
This is where I’ve been lately: shopping for, buying, and planning a renovation of our new ski condo. Since I’m a stay-at-home parent, it makes sense for me to be the primary manager of our vacation rental, so I’ve been researching and reading and pinning and shopping and generally obsessing with this condo. Part of the big plan is we want our place to look FANTASTIC in online listing photos, so I have been channeling my inner Joanna Gaines, and reminding Jon that he’s my Chip. I HAVE A VISION, OK?
My goal is to make our condo a stylish, rustic/industrial (no cliche lodge furniture or generic decor for us!), family-friendly destination. Because I know what it’s like to travel with little kids, I especially want to make it the number one unit people want to rent when bringing kids to Keystone. We will have pack and plays, high chairs, night lights, baby monitors, bouncy seats, toys, books, and more to prevent families from having to schlep so much gear. Also, our condo has a private pool not shared with any other buildings, and our unit is on the quiet slope-side of the building with no neighbors above. We also chose a unit close to the playground and skating rink/putt putt course, with the Kidtopia headquarters in the same building. Kidtopia puts on cool kids events and activities– on a recent visit, our girls participated in a strider bike race, and Claire got second place! Our unit has slope views, and you can walk to the lifts.
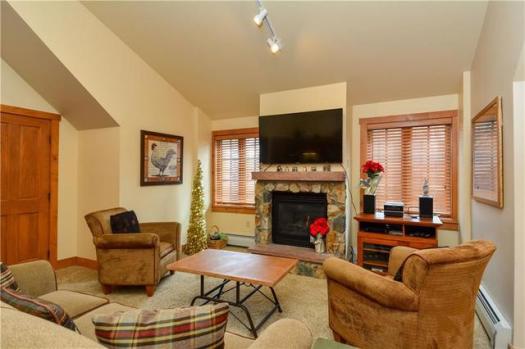
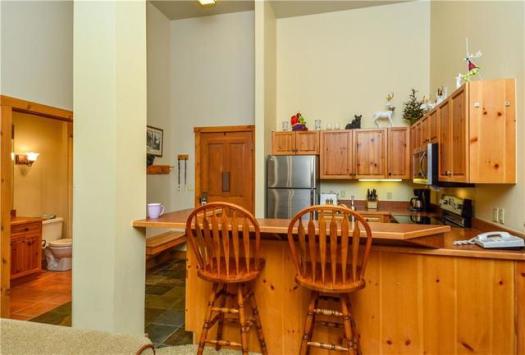
I figured I would share our “before” photos this week, and next week will be the big reveal of our renovated unit. If you want to go ahead and make a reservation, you can check out our VRBO listing and sign on up!
I am not sure which is more baffling here, the permanent Christmas decor, or the chicken-themed art in a ski condo.I would describe the “before” aesthetic as “aggressively brown.”
Having both a queen murphy bed and a queen sleeper sofa, plus a third bathroom, means this 2 bedroom condo can sleep a TON of people.BEARS! DEER! CHEVRON?Fun fact: tons of Keystone condos have this exact bedding. And wall art. I think it came with the place when it was built in the 90s. Which means tons of folks are happily paying the big bucks to sleep under 20 year old bear comforters. Ew.Am I the only person who irrationally hates tchochkies on top of cabinets? They just get sad, dusty, and gross.
We are ditching the twin beds for a queen with a lofted twin above it. I’m also turning the skylight nook into a cute play space.That balcony view, though.
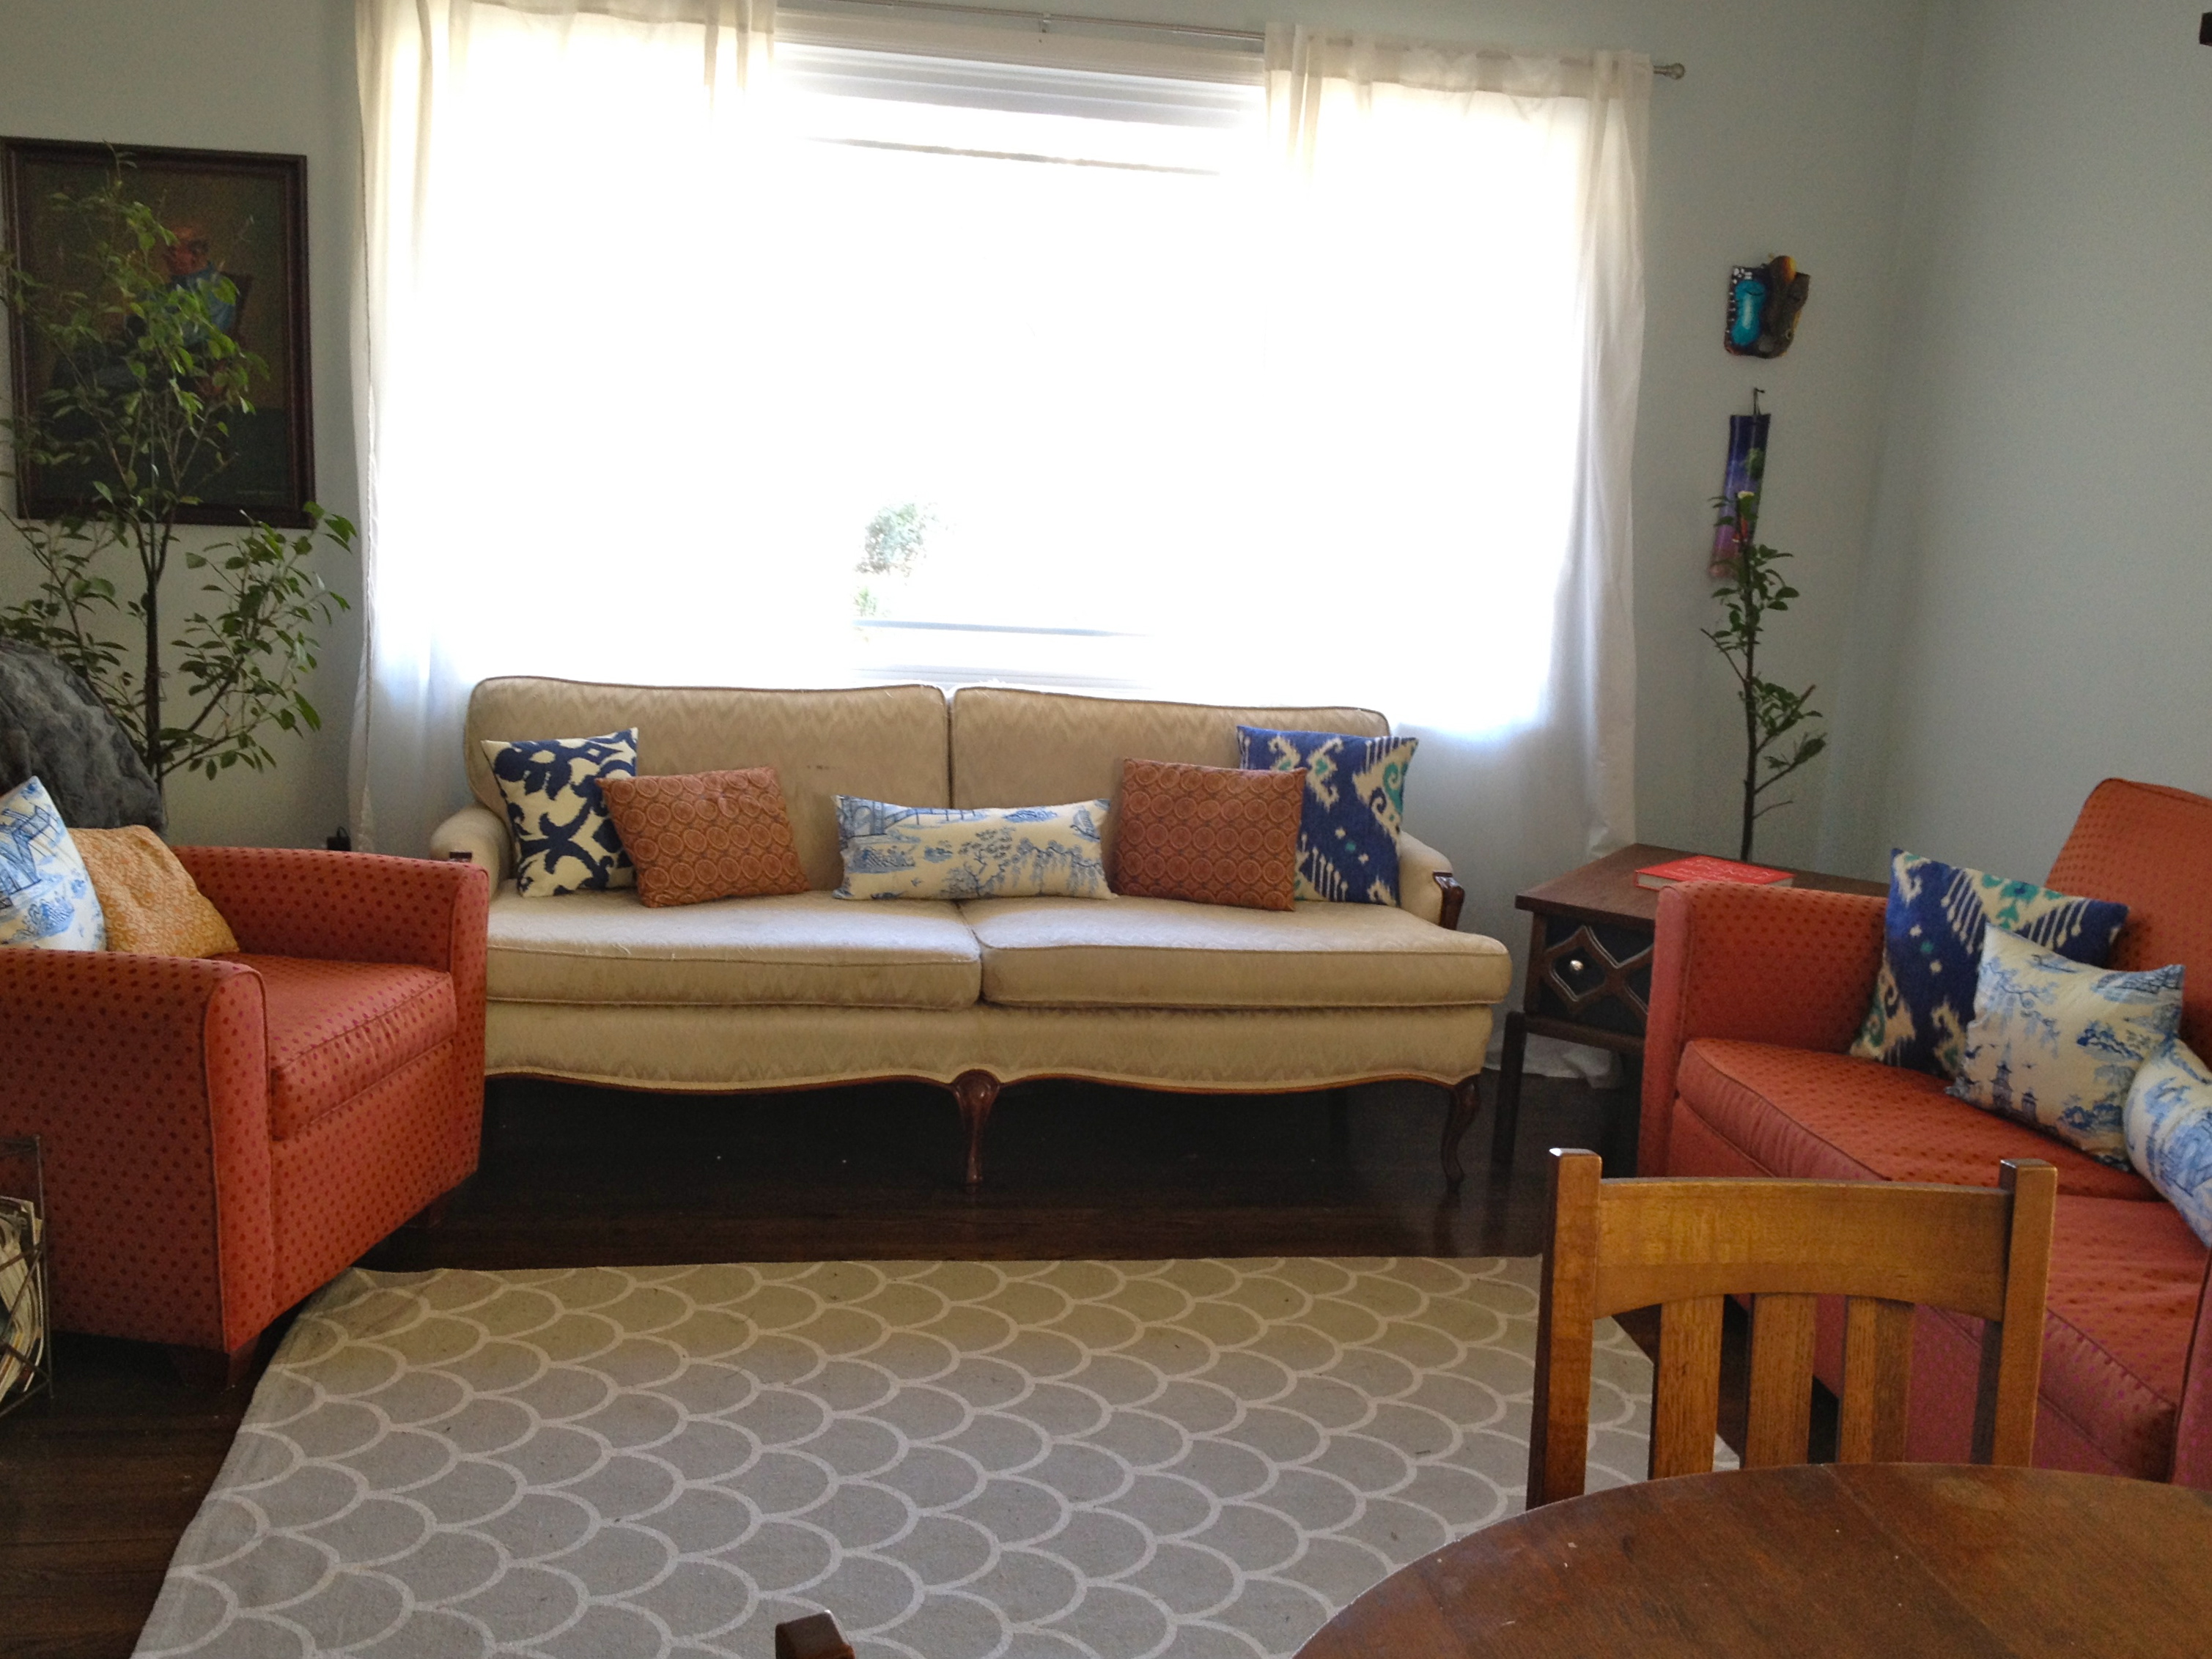
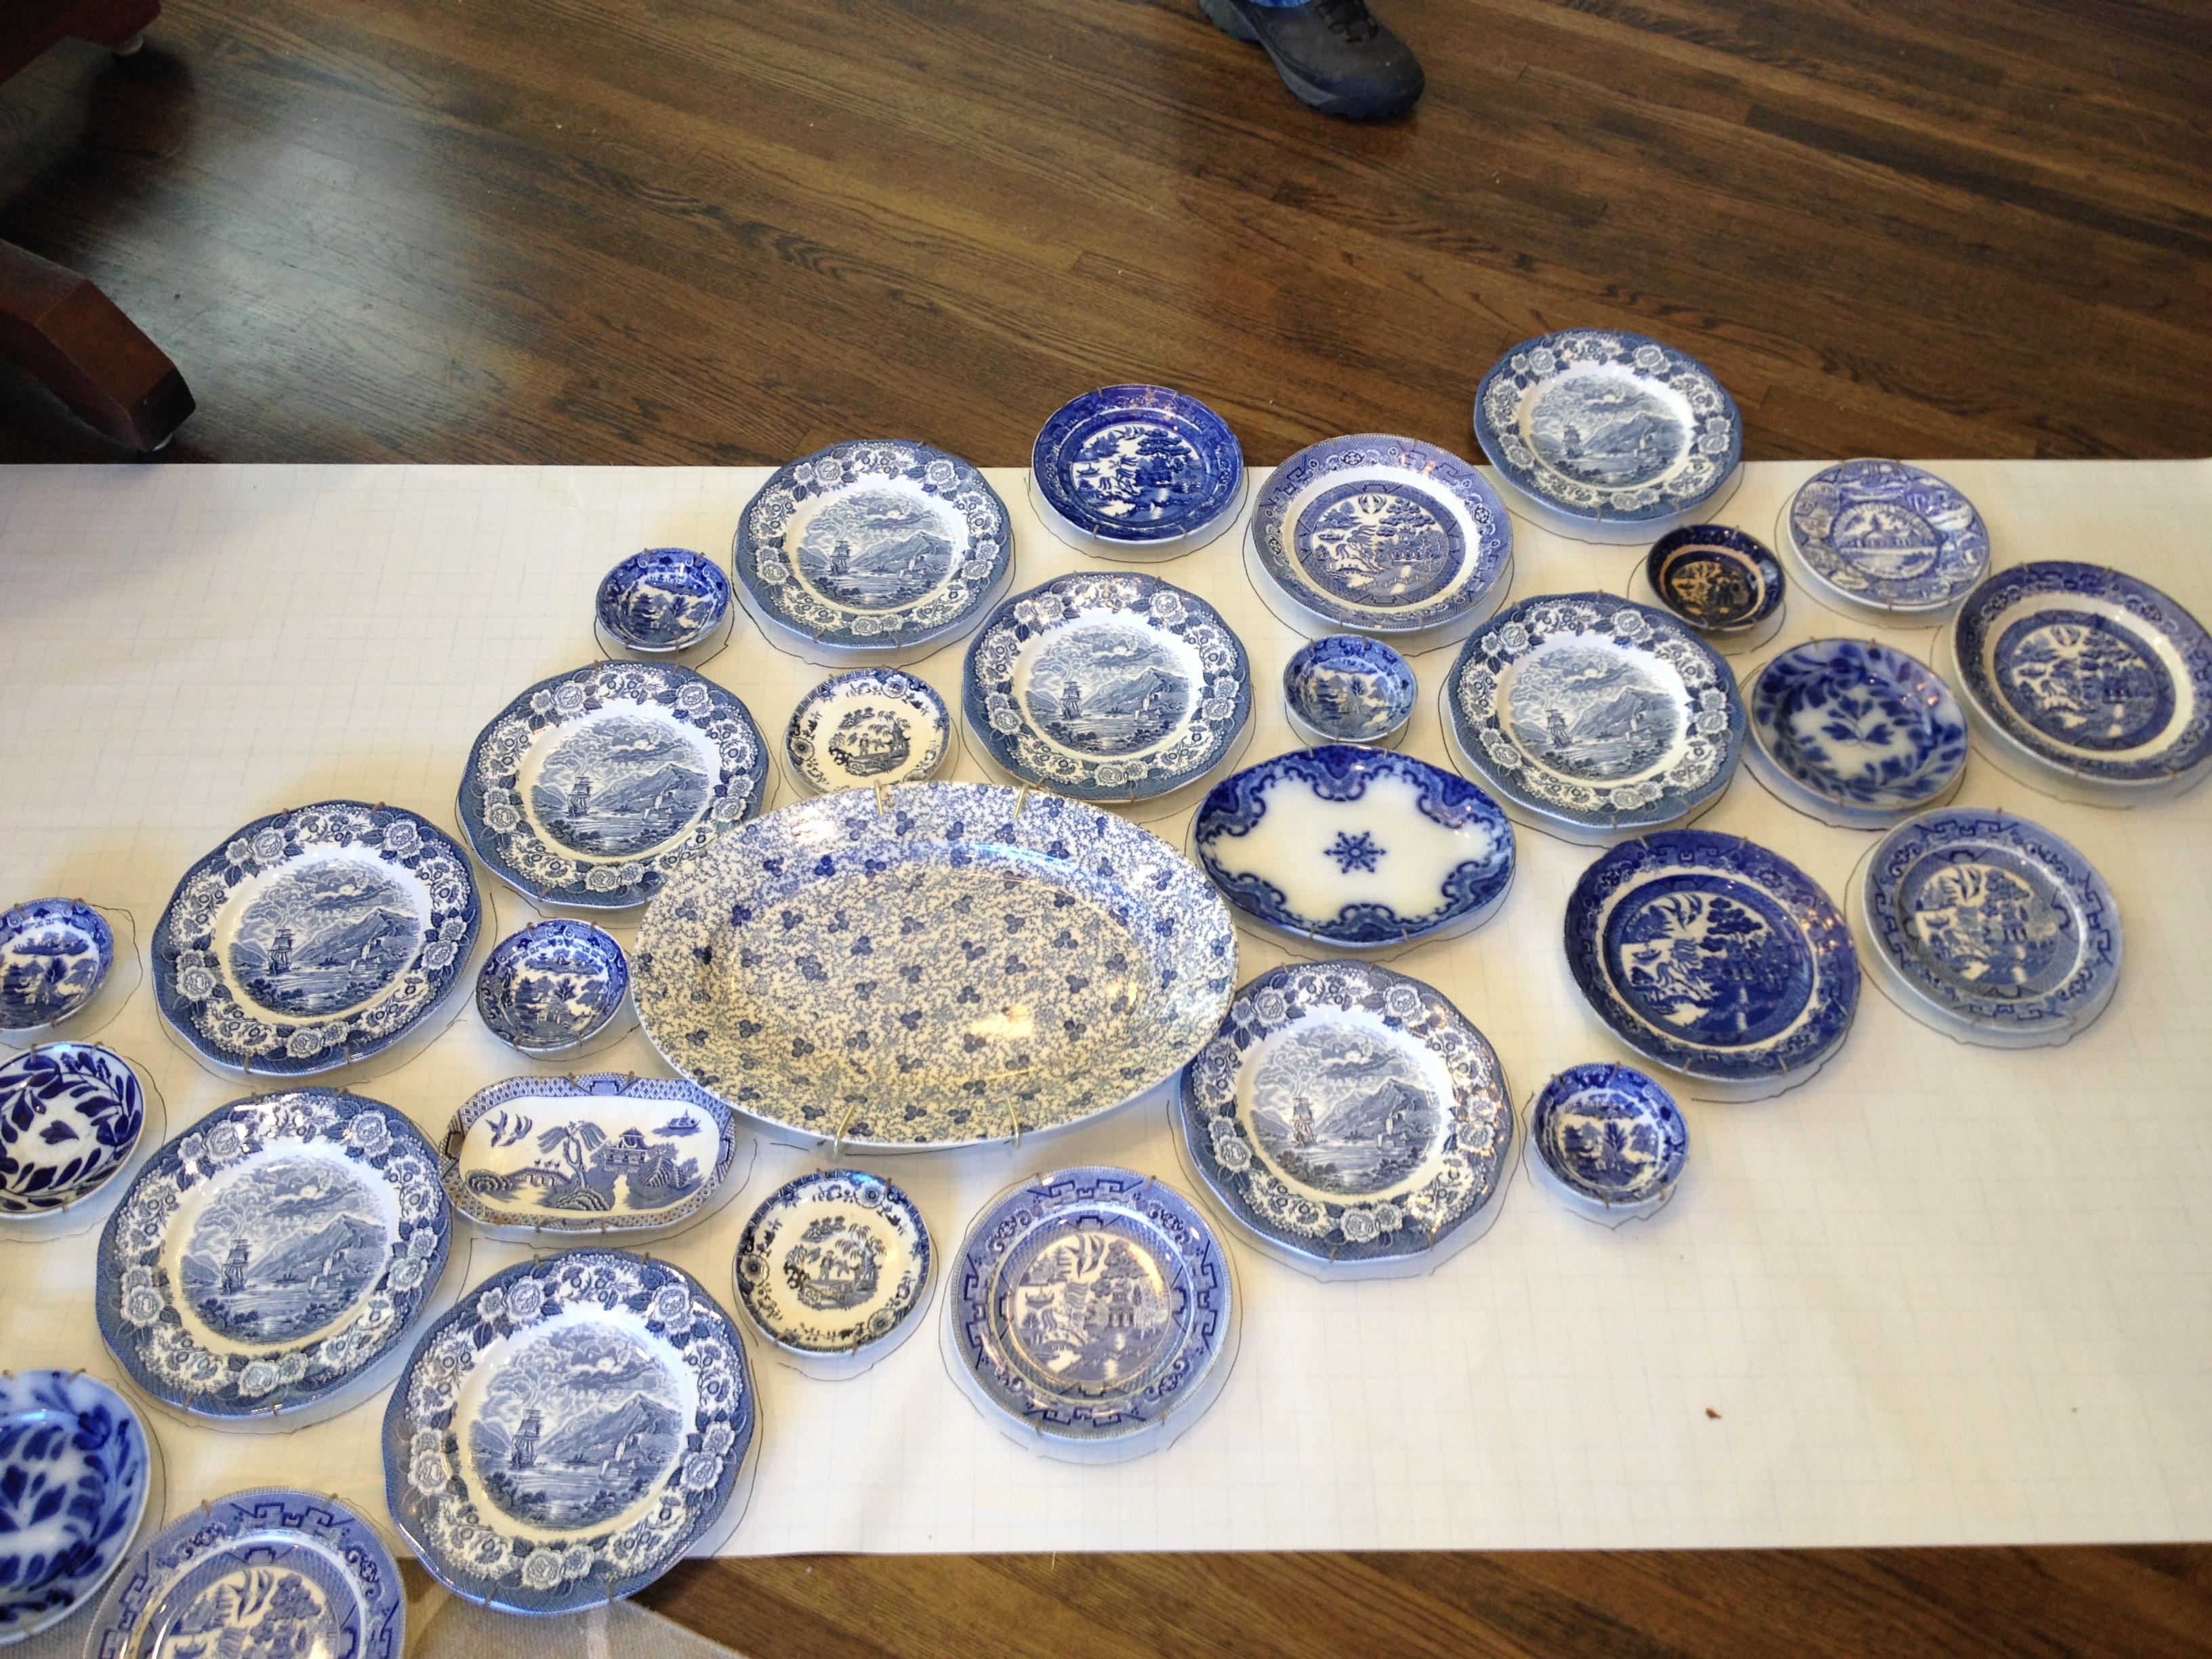
A few years ago, I inherited from my grandmother a collection of blue and white plates, some of which my grandfather had sent home from WWII to his mother. I have loved and treasured them in a cabinet for several years, but knew that the next time we owned a home, I wanted to decorate a room around displaying them. Well, we finally bought a house last summer, and all these months later, I’ve finally (mostly) finished our front/dining room.
It’s a weird space, because it’s the first room you enter after walking in the front door, and there’s a strange freestanding closet that awkwardly sits in the middle of the room, I’m guessing because there used to be more walls that were removed, but the closet had to stay for structural reasons. I think the weird closet contributed to this house being on the market as long as it was, because it was hard to picture how furniture would go and how the room would be used. For us, it’s more of our formal living area, because there’s a big den in the back of the house where we have our giant sectional and TV and all of the girls’ toys.
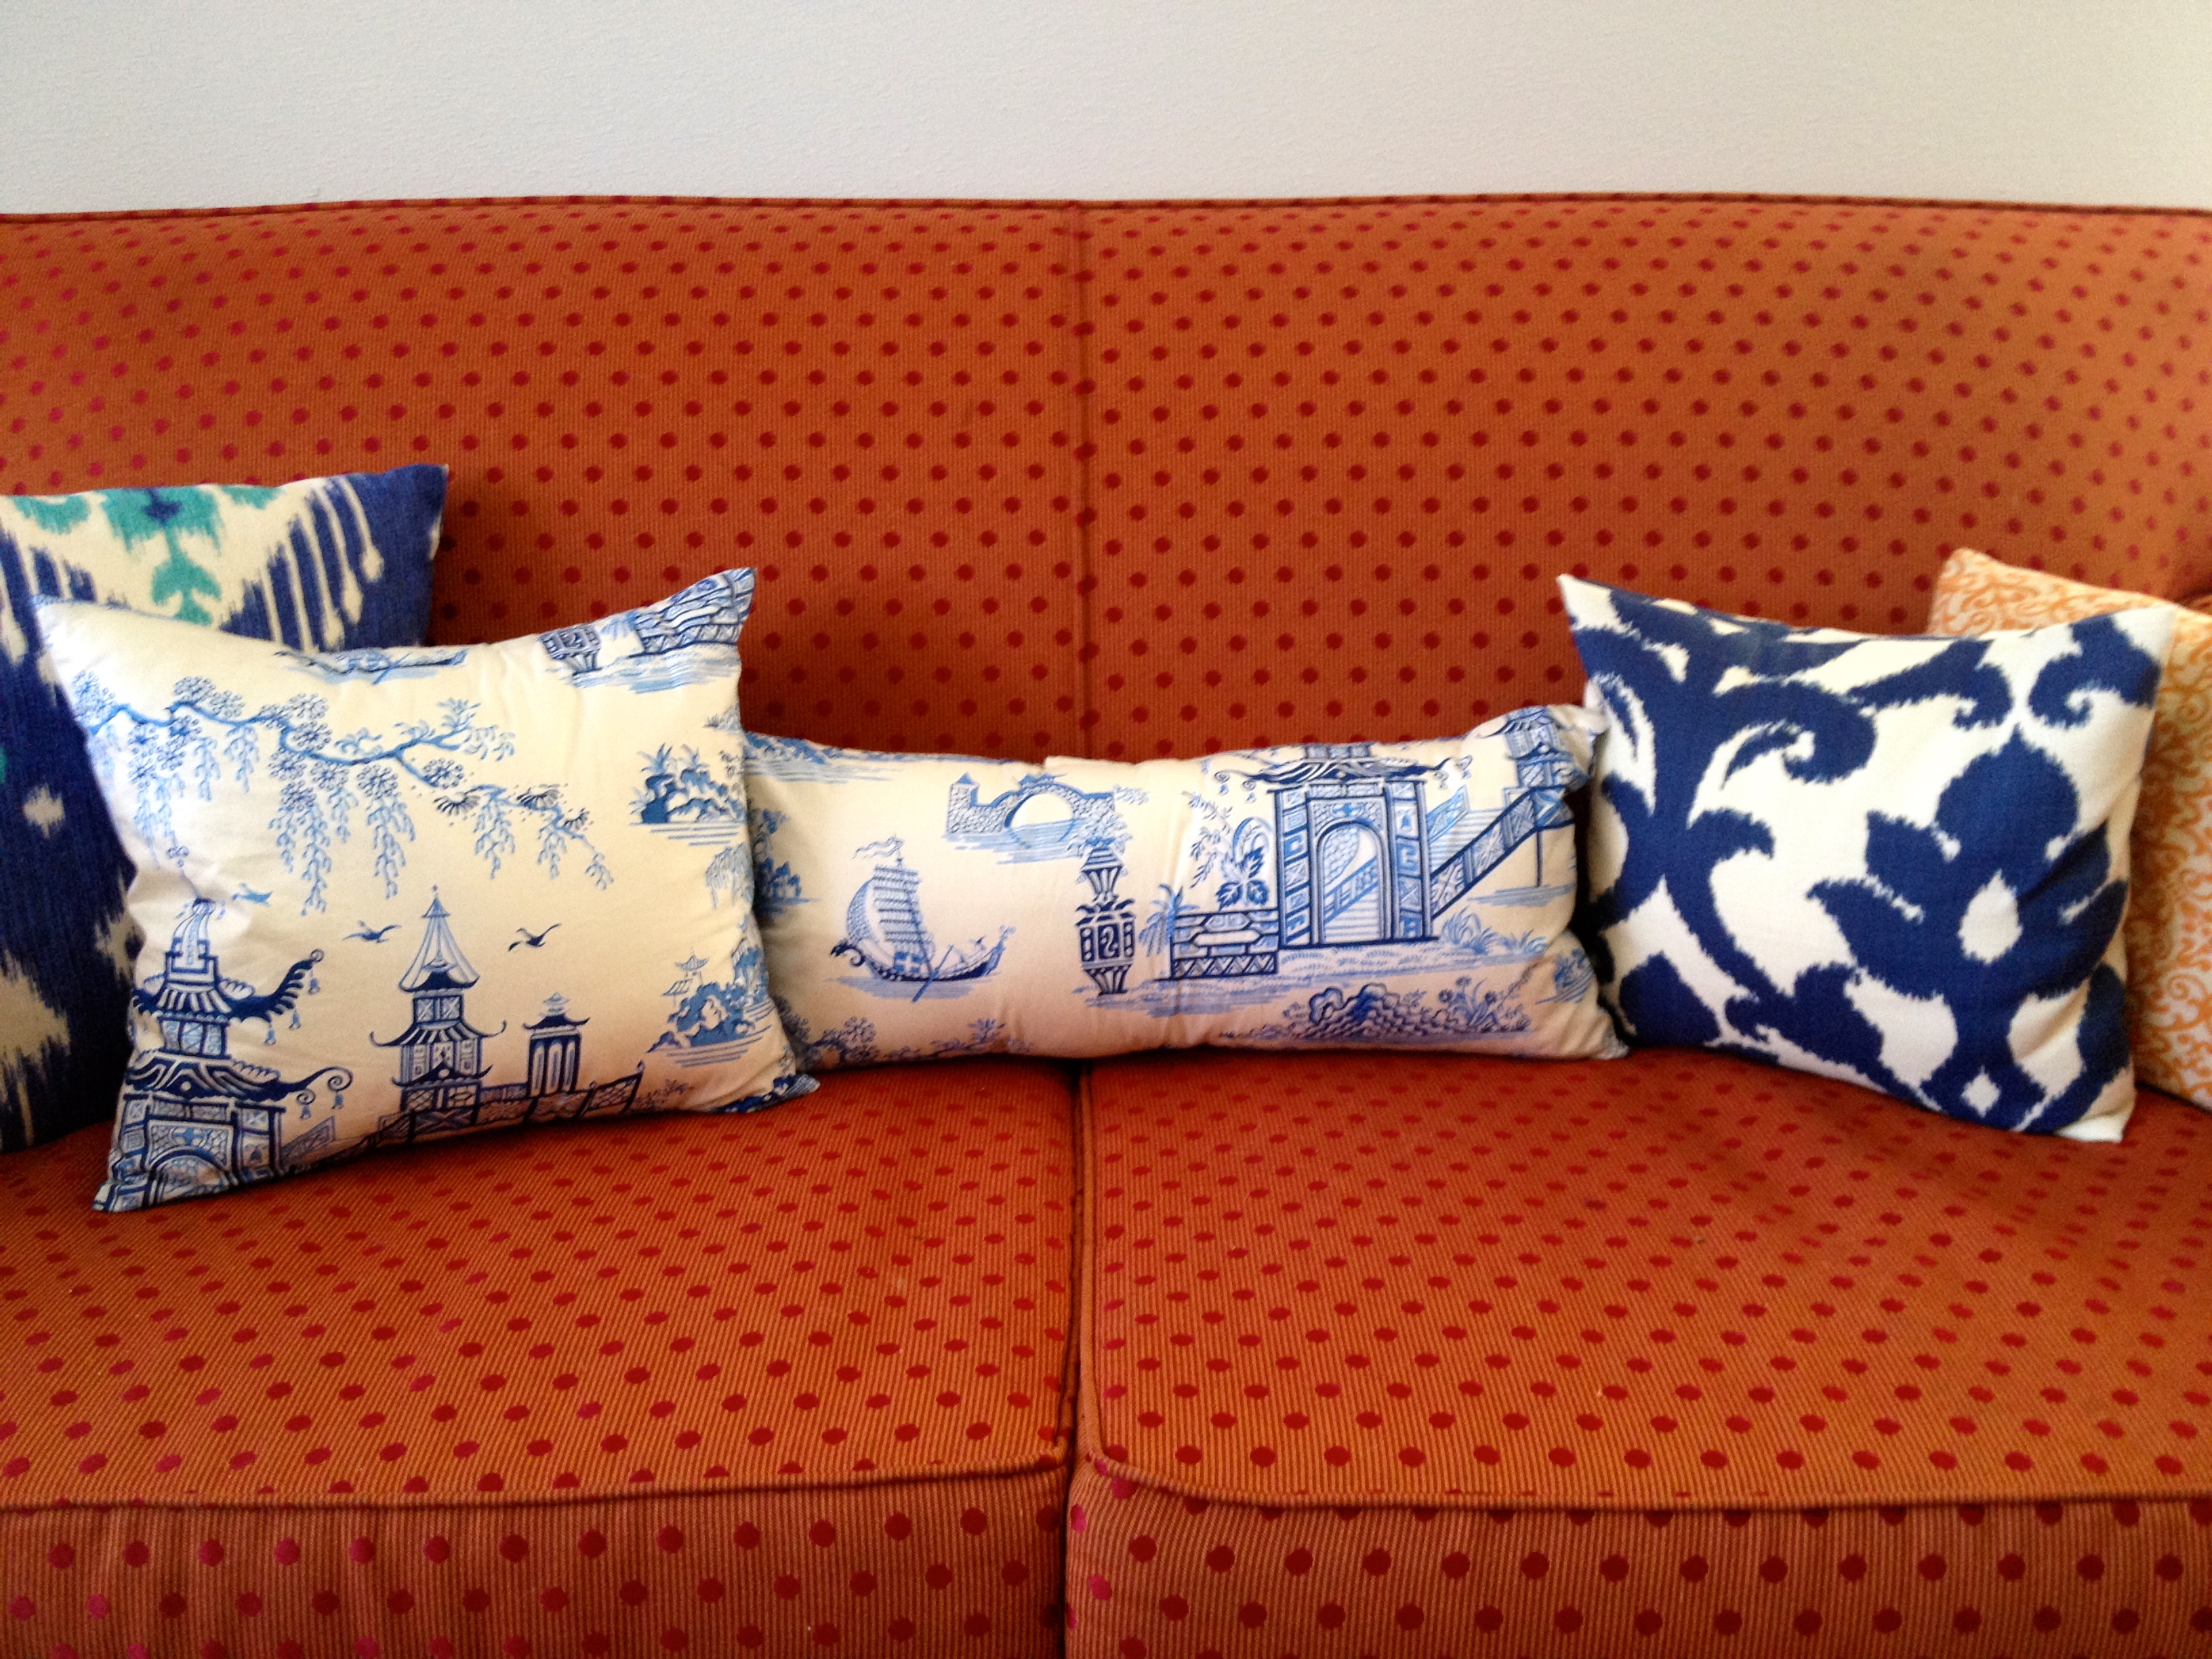
I made pillow covers (using this tutorial) in various blue and white prints to tie the plate wall into the sitting area, and I have plans to reupholster our couch and to recover the dining room chairs. I’m thinking solid colors for those, so let me know if you have ideas. The round table was a Christmas gift from my mother, who gave us her dining table after she heard me say I wanted a round table that expanded– this one has four leaves and can seat 12 with them all in place!
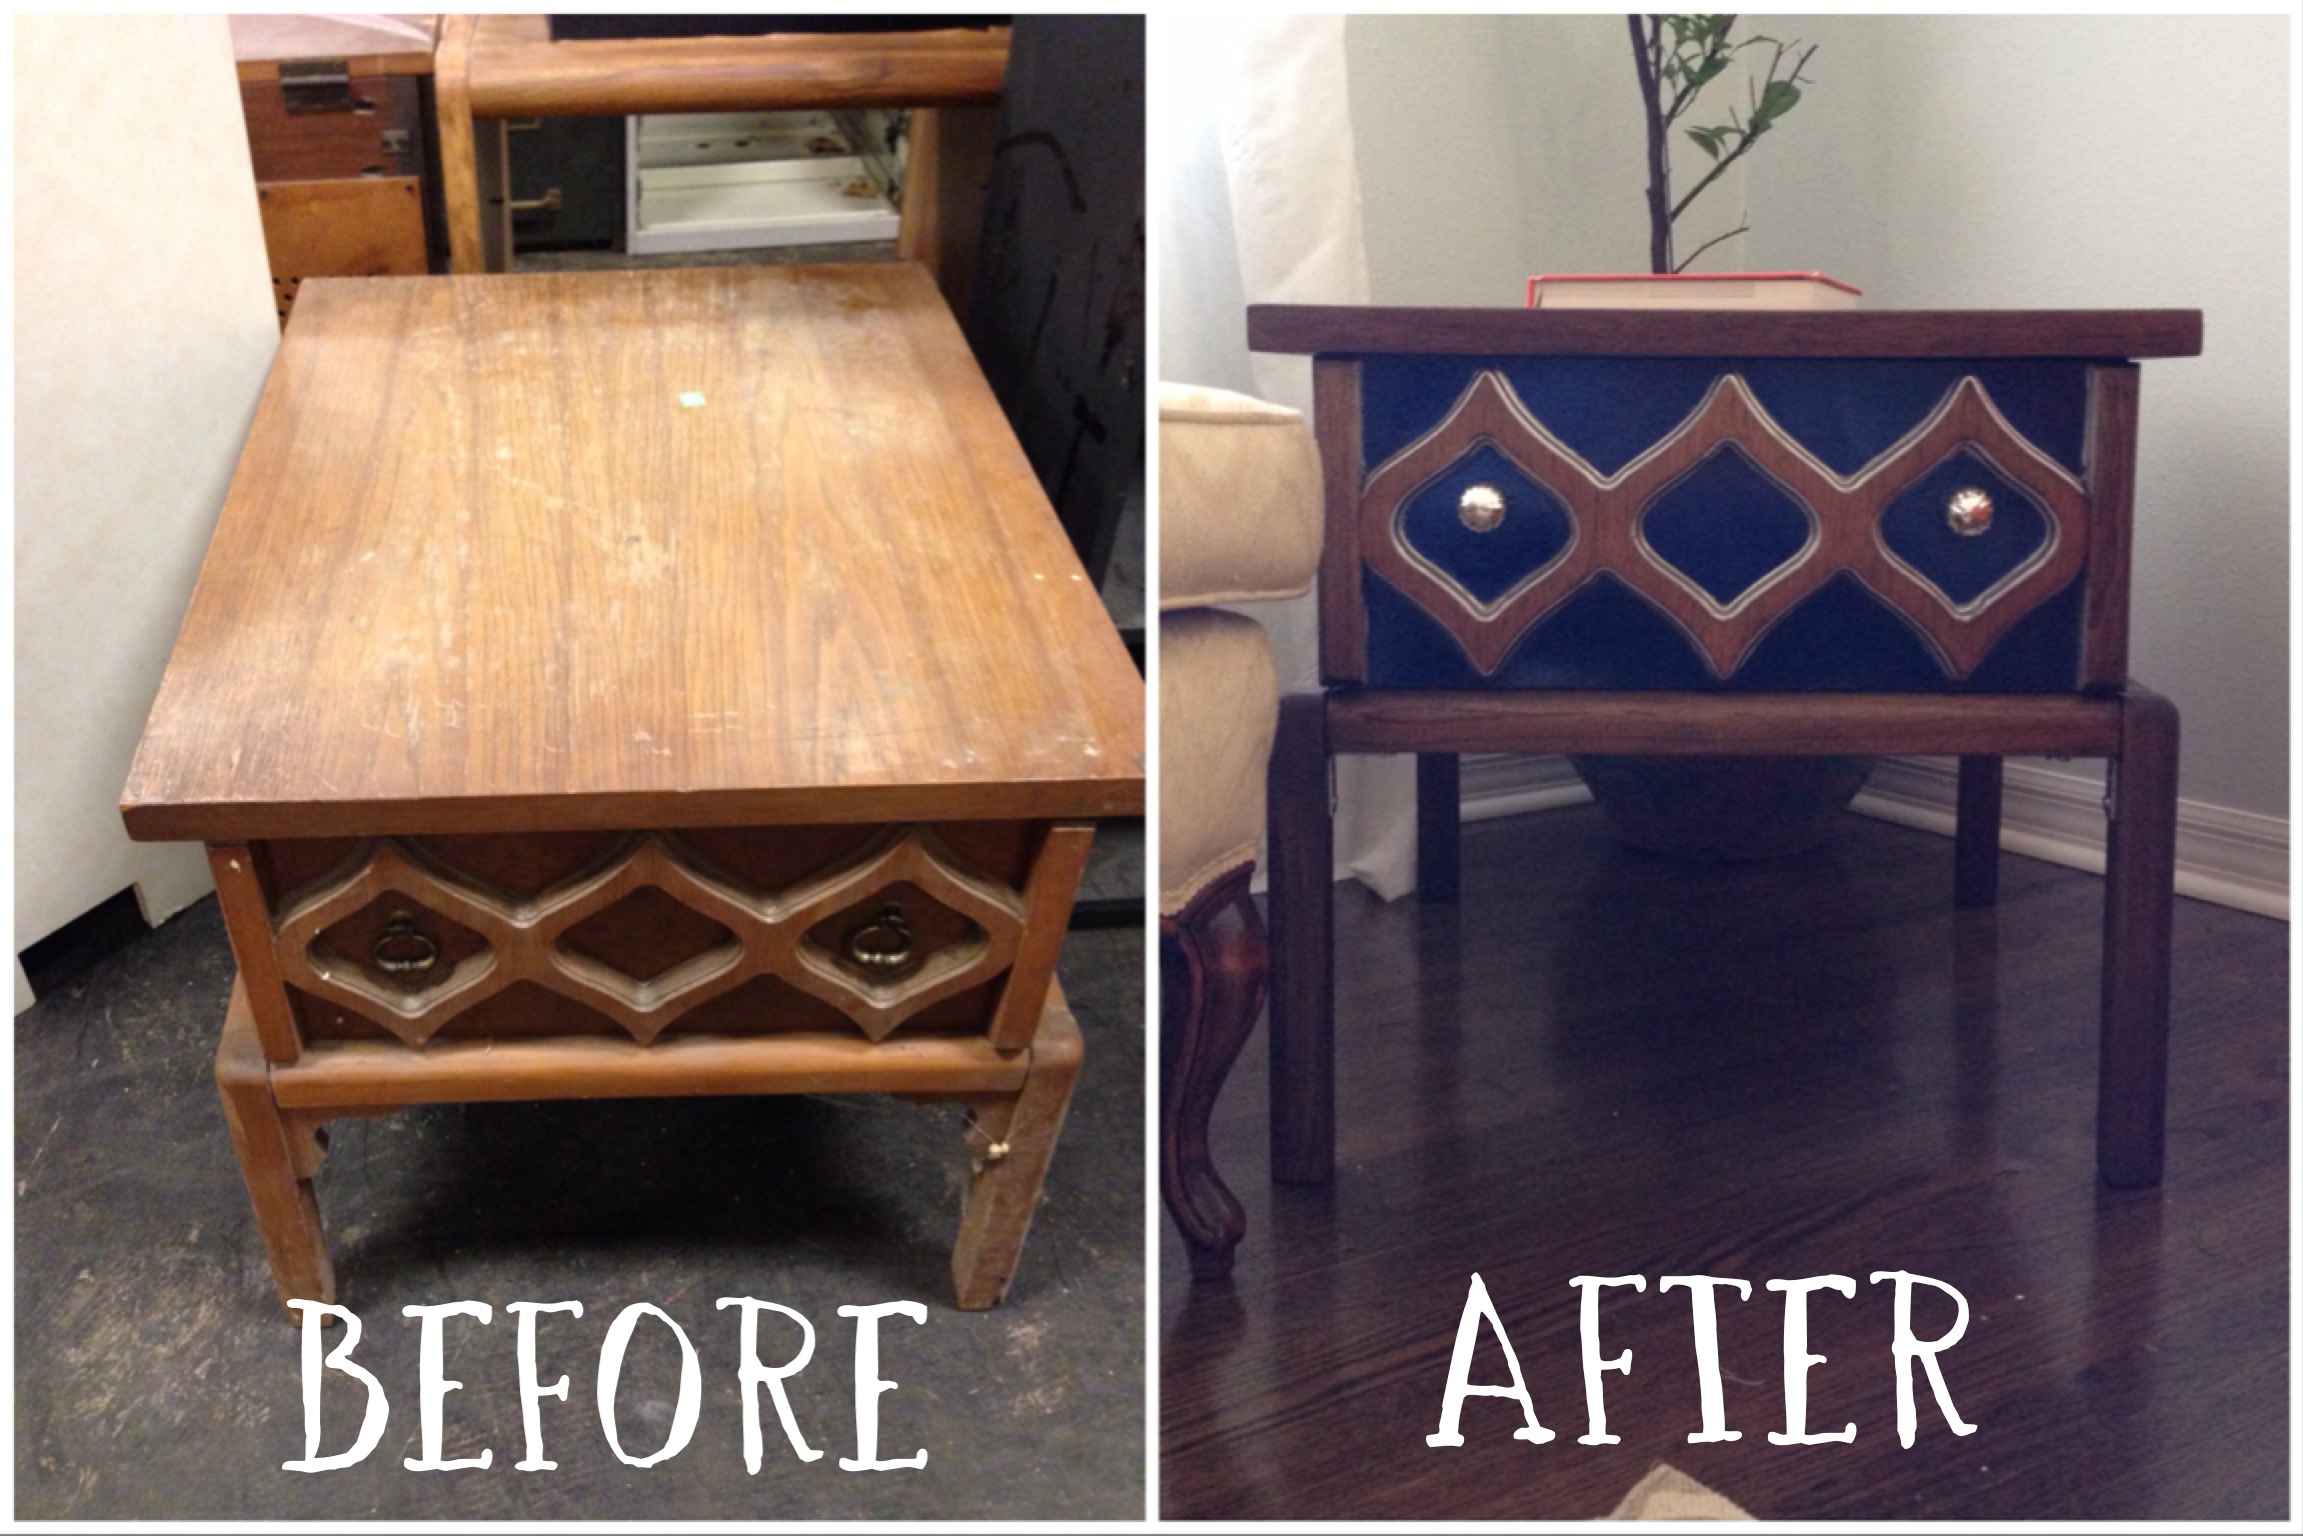
Another recent project, designed by me and executed entirely by my husband, was the remake of a thrift store end table.
The real showstopper of the room, though, is the plate wall.
In case you’d like to do a plate wall yourself, here are my plate wall tips: After asking some friends who had hung some plates, I settled on the metal spring plate hangers. I rolled out some extra wide wrapping paper on the floor and laid out the plates on top of it. Then, my husband and I traced around the plates, photographed the arrangement, removed the plates, and hung the paper on the wall. From there, we nailed hooks into the paper, and then ripped it down, leaving the hooks behind. I then referred to my photos to hang the plates on the hooks.
I love the way it turned out, and keep finding myself wandering into the dining room just to stare at the wall. It feels like something that belongs in the home of someone way cooler than we are.
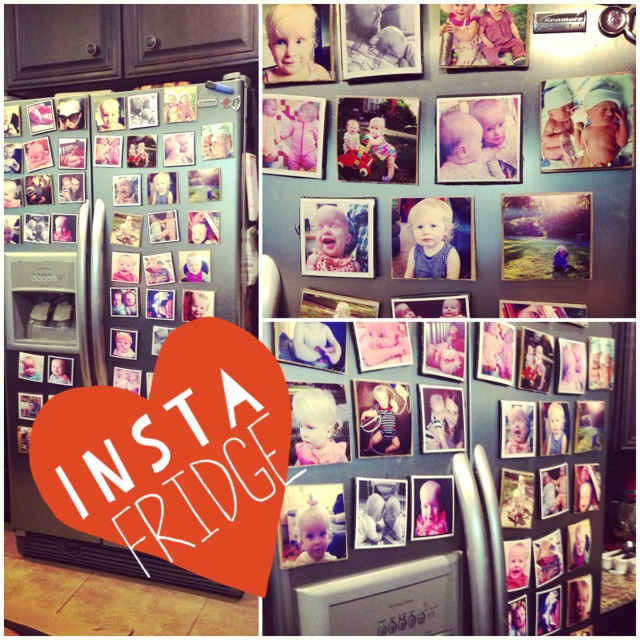
Check out my fridge, covered in pictures of my babies! You, too, can achieve such a cool (ha) fridge!
Here’s the deal: there are companies that will make you magnets out of your Instagrams (and lets be real, the best pictures any of us are taking these days are on Instagram), but they charge $15 bucks for 9 magnets, and they aren’t very big. Meanwhile, I was recently informed by a friend that Walgreens has a cool new app that, among other things, connects directly to your Instagram and prints 4×4 prints at your nearest store for you to pick up in just an hour or two. For 39 cents a pop. So, using my rudimentary math skills (aka a calculator, because I am an English and Poli Sci major, and math makes me cry), that’s $1.27 cheaper than the pre-made magnets per picture. The savings shrinks a tiny bit when you take the added step of turning the prints into DIY magnets, but bear with me:
Supplies:
1 sheet foam board, or, if you’re extra thrifty, 1 cardboard box
A bunch of Instagram prints
Photo Corners (like these, which are less than $5 for 250)
Craft magnets (Amazon sells bazillions for like a nickel each) + glue gun if you don’t get the magnets with adhesive backing
Scissors
Steps:
Affix pictures to cardboard or foam board using photo corners
Cut out squares
Glue and/or affix the magnets to the back of said squares
Stick all over your fridge
Laugh at schmucks paying $1.20 more per magnet for their StickyGrams that look tiny and puny next to your awesome creations
The bonus of using the photo corners as opposed to gluing the pictures directly to the foam/card board is that you can easily change out the pictures and reuse the magnets over and over again! Which will work great for me as my whole fridge is pictures of the Bufflo Gals, and they tend to do this pesky growing up thing, which means I need to update the pictures regularly.
I know blogging’s been sparse around here lately. I fell off the vegan wagon and the blogging wagon at about the same time. It’s a good thing though: I’m studying feverishly to try and pass the last step between me and an MA in English Literature: the dreaded comps exam. So, expect blogging to resume something resembling regularity sometime after the first week of April, at which point I’m sure I’ll have cute Bufflo Gals’ 1st Birthday photos.
Meanwhile, I’ve got a new routine going in my kitchen, and it involves living organisms.
No, I’m not raising goats or something out in our rented back yard. I started making my own yogurt and now I don’t even know who I am anymore. I distinctly remember a friend saying she made her own yogurt one time, and thinking to myself, “that’s nutty. Just buy the yogurt, ya weirdo.”
But then I got my almost-one-year-olds off formula, discovered they love whole milk, and discovered further that they REALLY REALLY love whole milk yogurt. And that YoBaby shiz ain’t cheap.
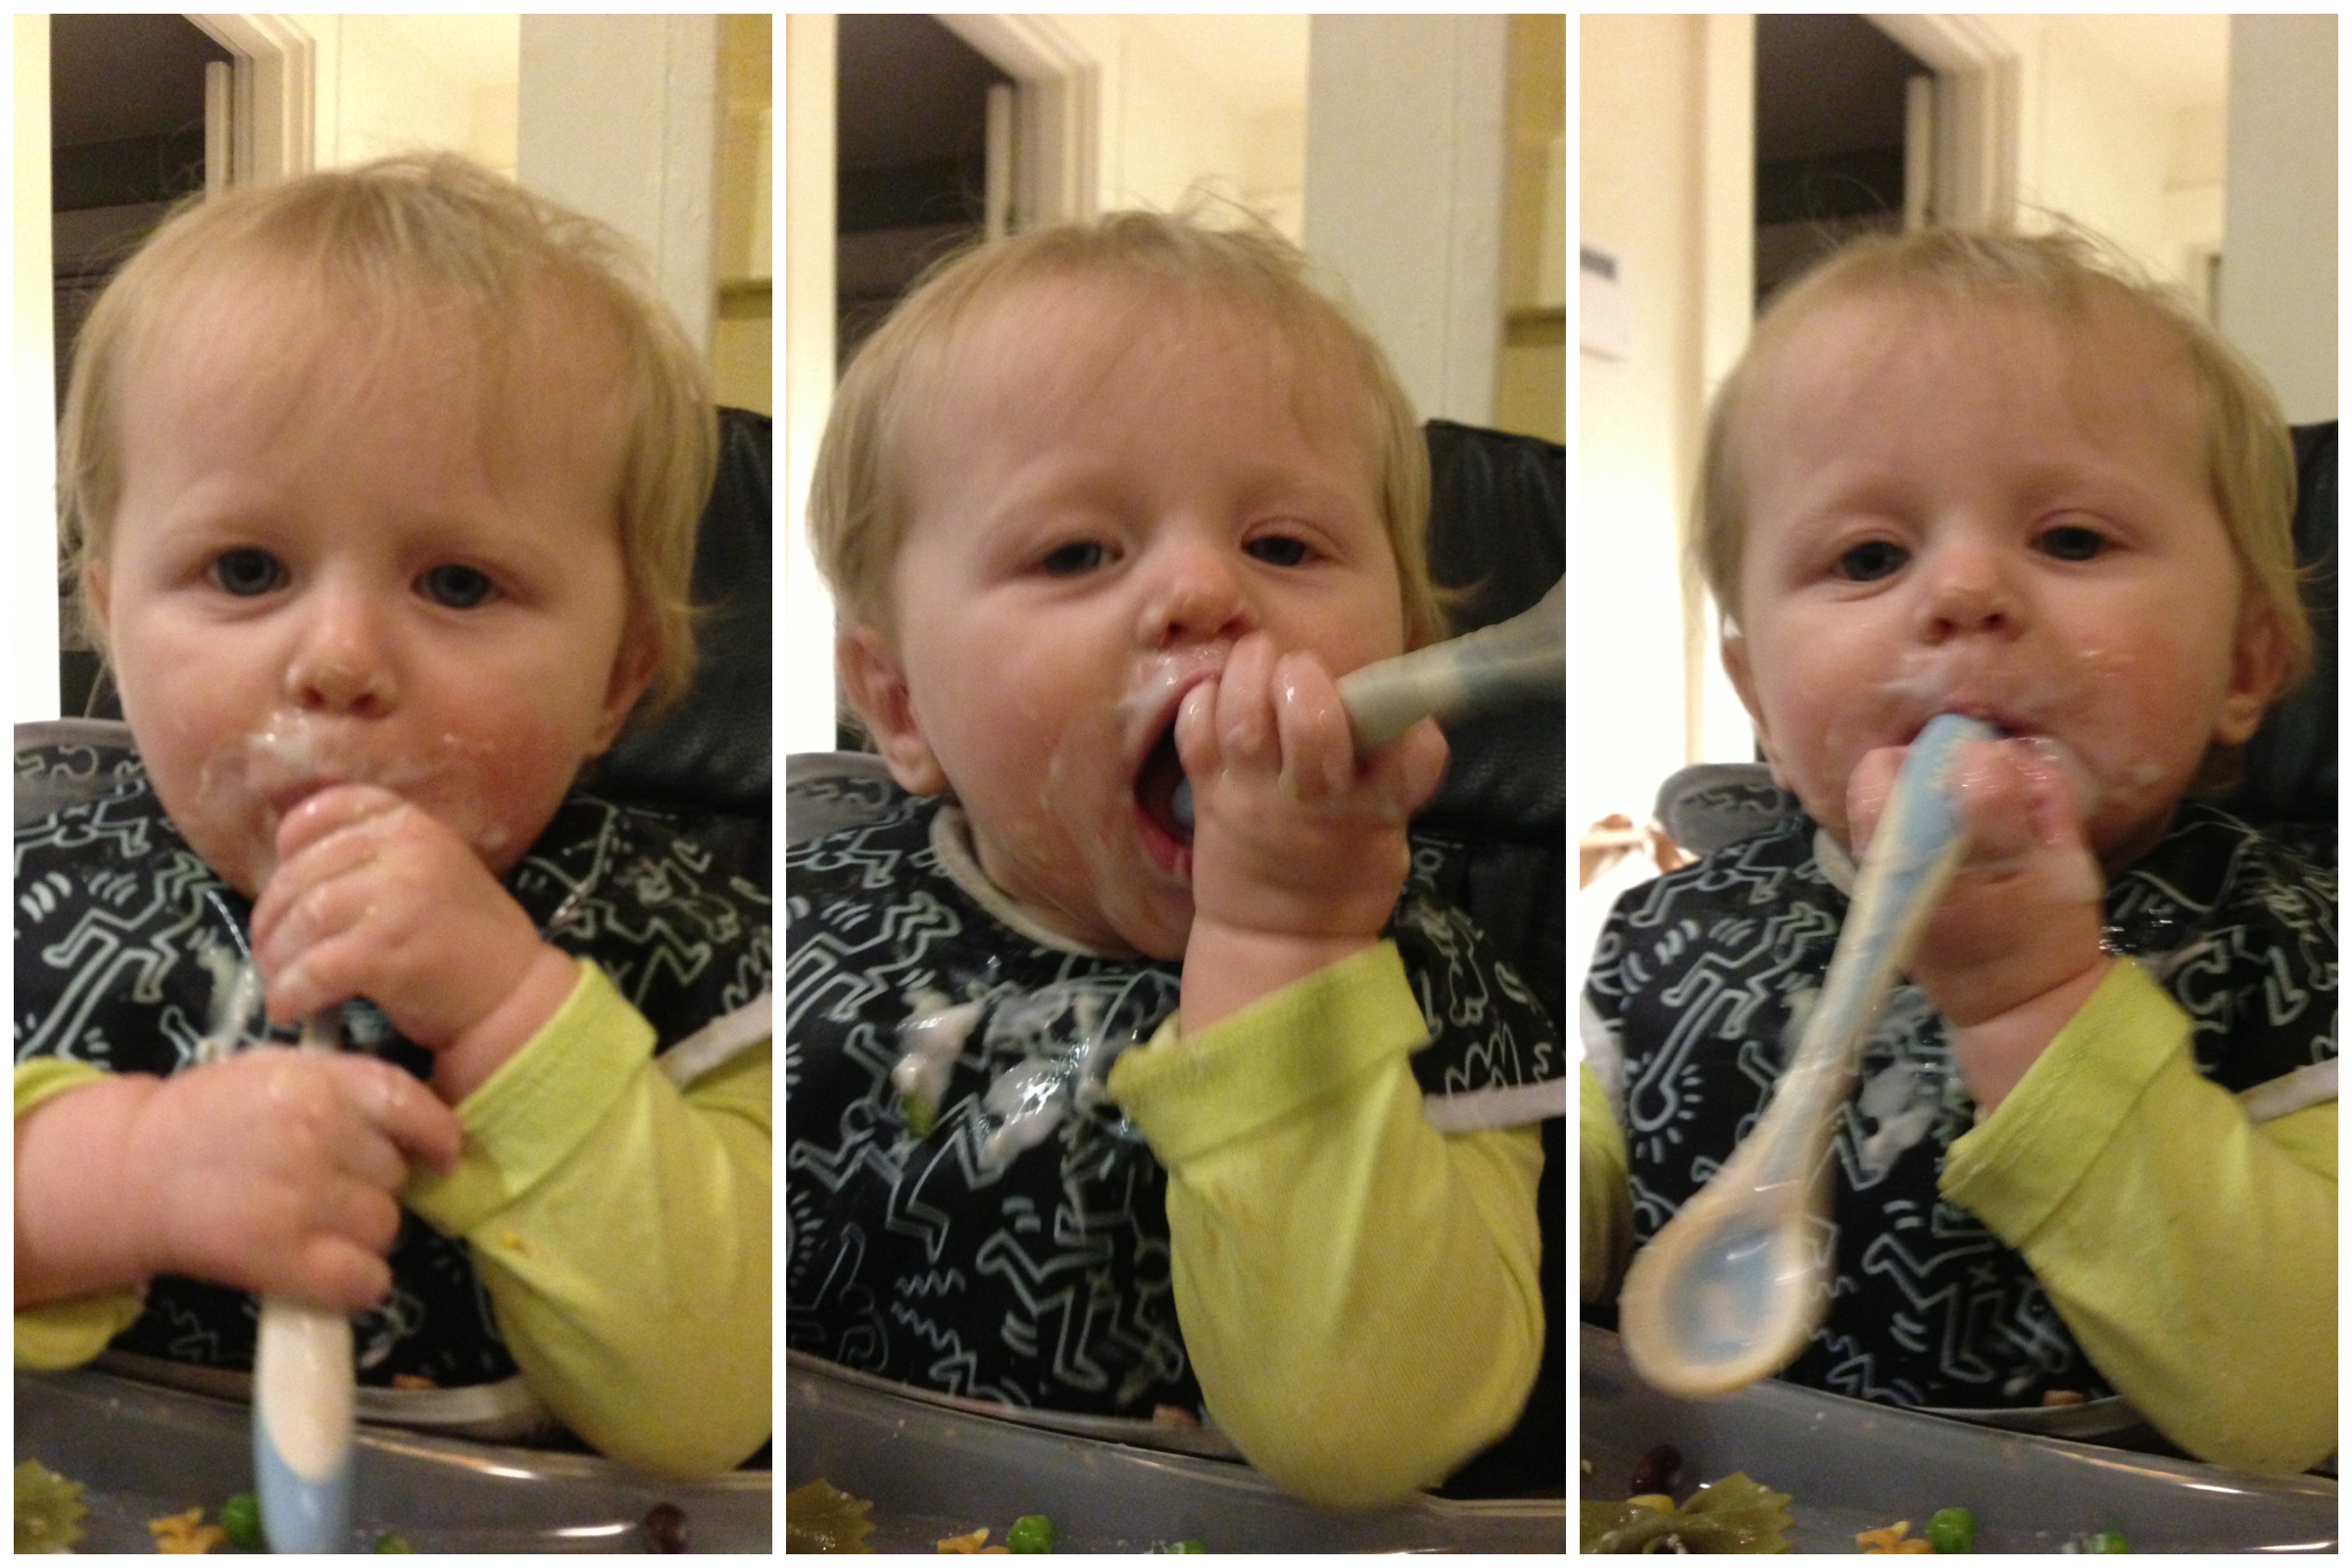
Yogurt faces.
Another problem: though Claire loves to be spoon fed (she lives on purees, after all), Little Miss Feeds Herself wants no part of me lovingly spooning yogurt into her mouth. If I let her try to spoon feed herself, every end but the end with the yogurt gets in her mouth, and it’s an epic mess. If I try to feed her myself, it’s an insane battle of waving arms and yelling at me as she tries to grab the spoon while I’m trying to stick it in her mouth. About every 5th bite gets in there, which is nuts.
So, to solve the “my kids eat 8-16 oz of yogurt per day” problem and the Etta loves yogurt but eating it with her hands is difficult problem, I have discovered two solutions.
The first, as I mentioned before, is making my own yogurt. I basically follow this process from Annie’s Eats. I heat half a gallon of milk to 180 degrees to denature the proteins in it (which is apparently important). Then, I pour it into a Pyrex glass bowl and cool it to between 110 and 120 degrees. Then I add a couple of tablespoons of yogurt (at this point, I use the last bit of my homemade yogurt, but my first batch used plain Stonyfield Farm whole milk yogurt), and stir. Then, I preheat my oven for one minute (which gets it to about 120 degrees) turn it off, and turn on the light. Meanwhile I put a lid on the Pyrex and swaddle the whole thing with a few kitchen towels.
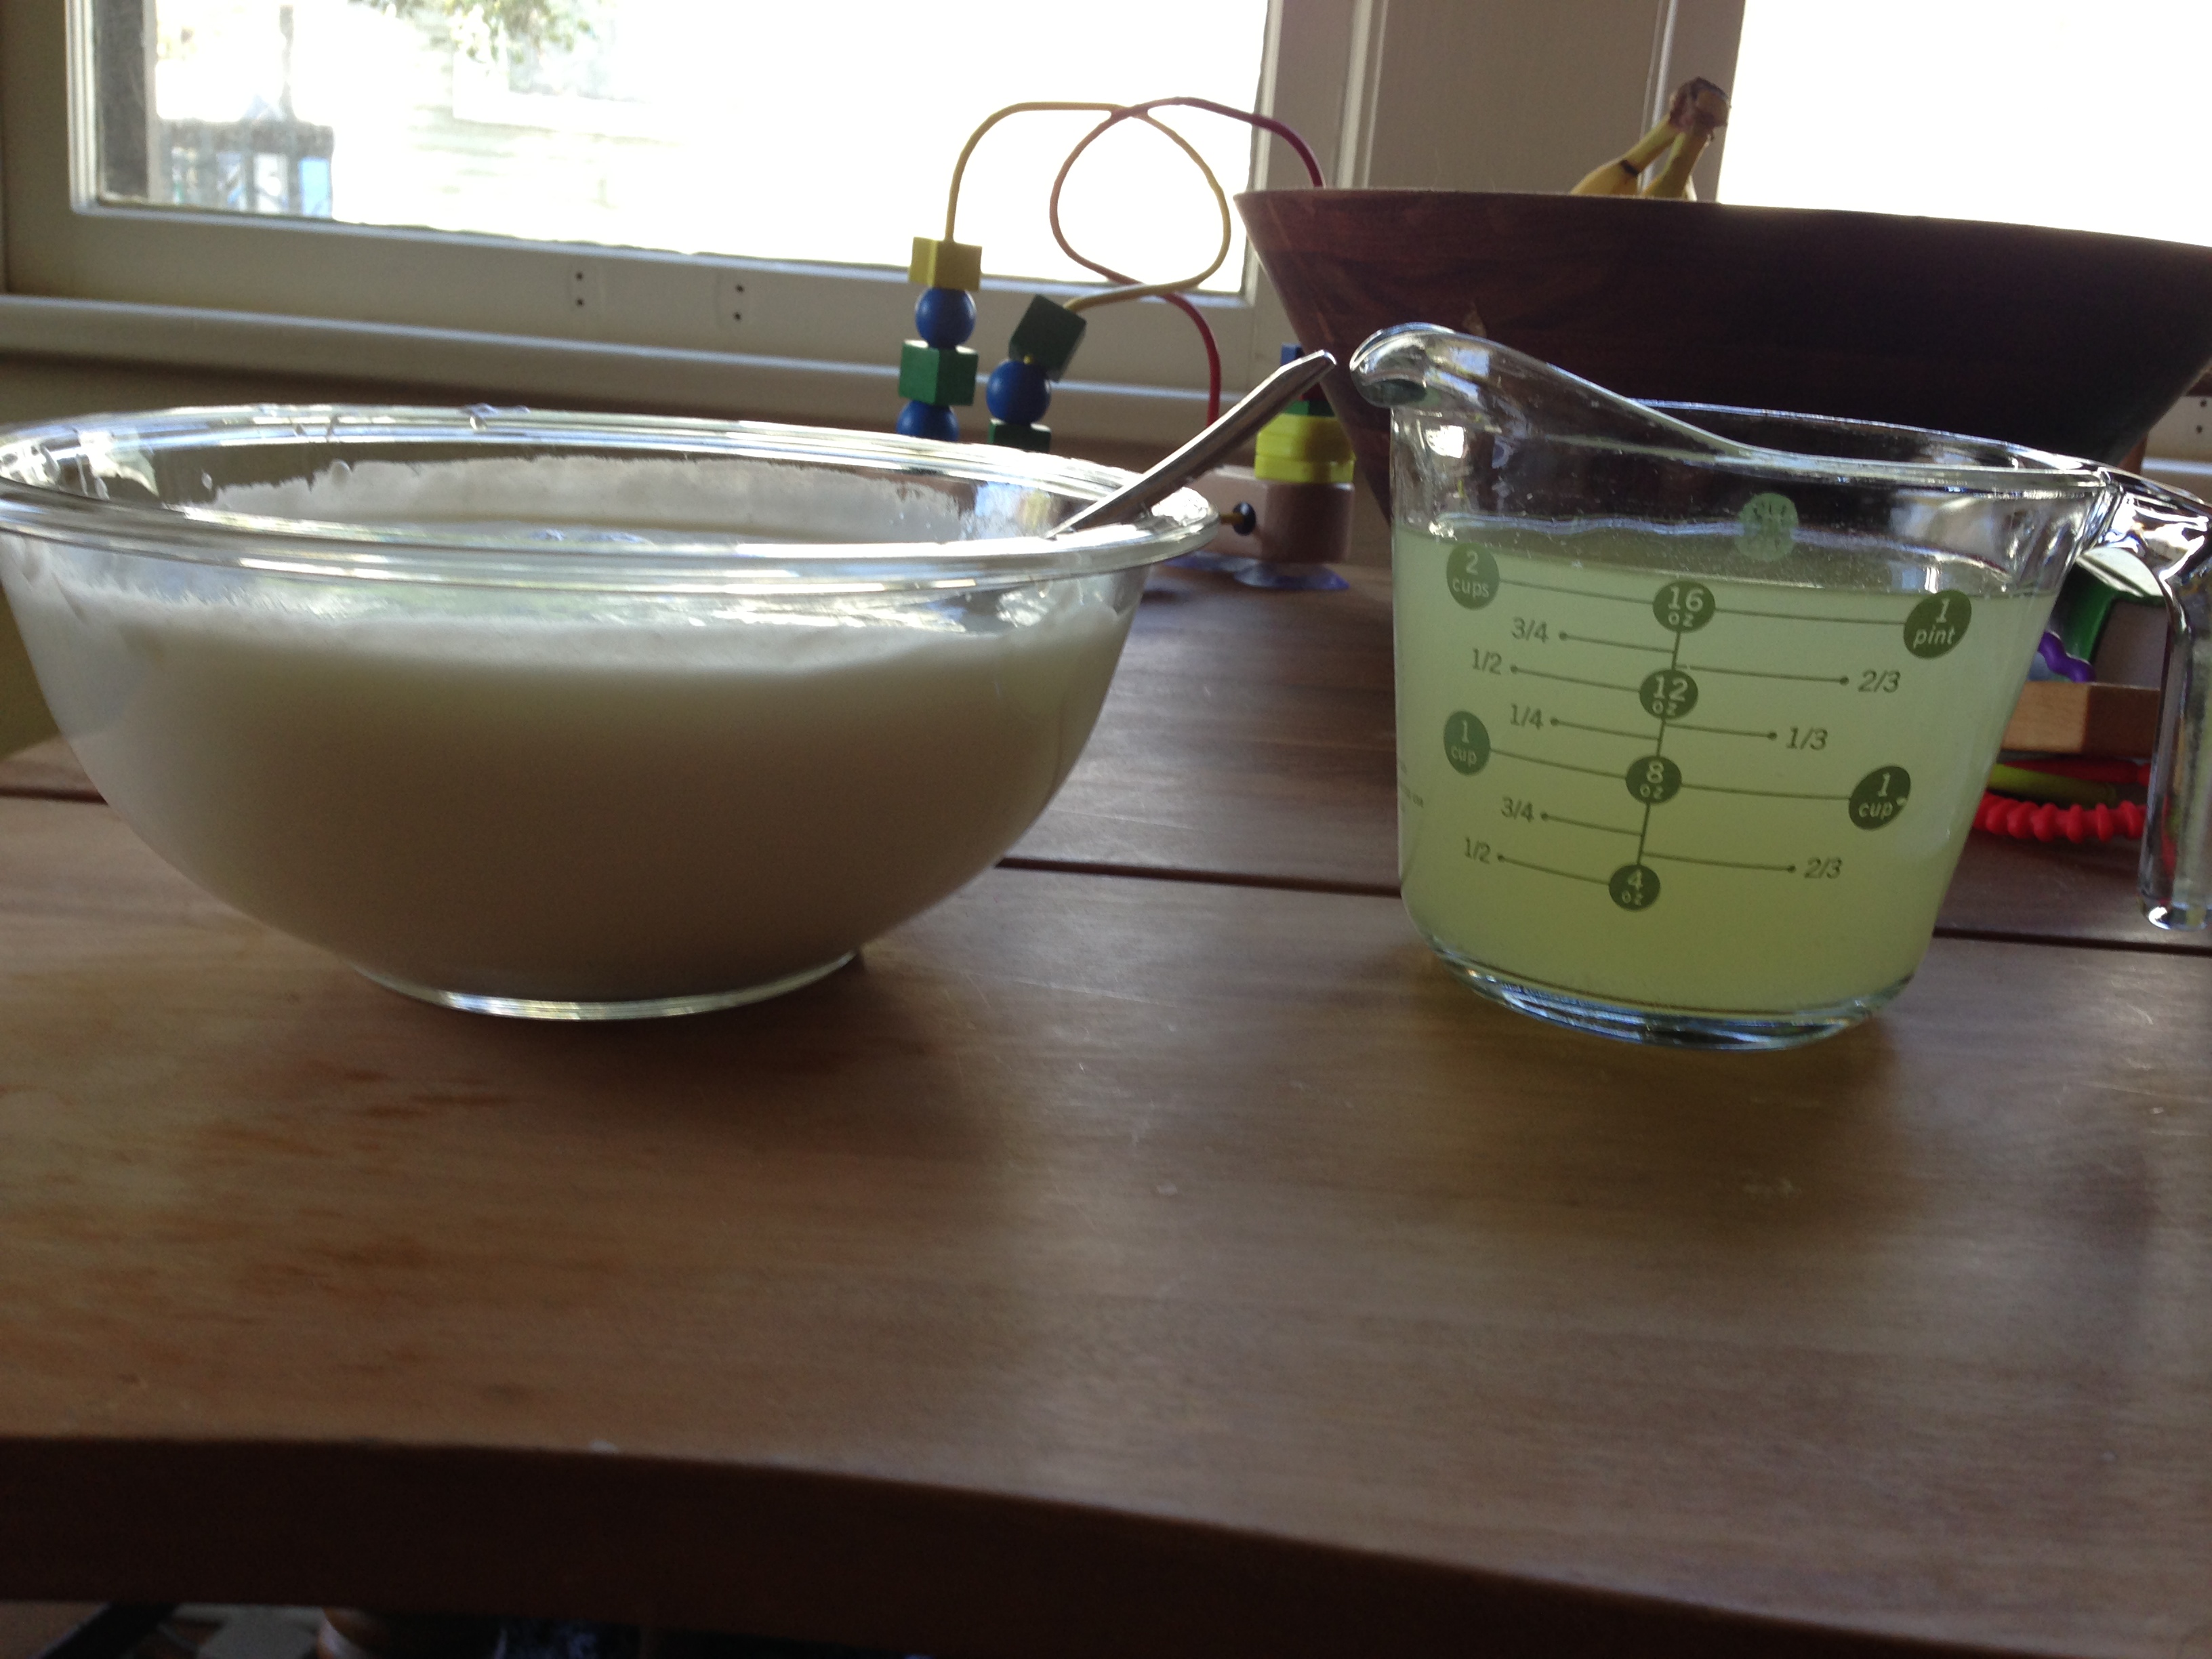
I leave the Pyrex in the oven with the light on overnight, for about 12 hours. In the morning, when I wake up, I go in, take off the lid, and it’s yogurt. Well, yogurt swimming in whey. So, I line a colander with either a couple layers of cheesecloth or a thin dishtowel like a flour sack towel, and set it in a bowl (you could just do the sink, but I’m saving the whey because I’m crazy and want to try making whey ricotta cheese), and strain the yogurt until it’s nice and thick and creamy. Half a gallon of milk left overnight yields 1.5 quarts of yogurt and 2 cups of whey. Scraping it off the towel with a spatula is really as tough as the work gets here.
What the yogurt looks like when I take it out in the morning, pre-straining.Straining yogurt through a colander lined with a flour sack towel.Resultant strained yogurt and whey.
Taste-wise, the homemade yogurt is just as good as the plain whole milk yogurt I was buying. It works great as a sour cream substitute, too. To serve it to the girls, I usually mix it with some pureed fruit and some oatmeal baby cereal so they get a complete breakfast. For snacks or when they need a little something after dinner, I just stir in a smidge of agave syrup for sweetness (because they can’t have honey yet).
This brings me to: how do I get the yogurt into the girl who won’t be spoon fed?
I had seen on Pinterest some reusable baby food pouches that are basically the same as those Plum baby food pouches, except the spout is on the side and the top is like a Ziploc bag. So, after searching on Amazon and reading some reviews, I decided to go with the Yummi Pouch (consider this a mini-review, I guess) because they were cheaper than the Little Green Pouch, which I was also considering. They are awesome, y’all. I just fill them with 4 oz. of yogurt, zip up the top, hand it to Etta, and she knows exactly how to hold it and suck the yogurt out of the spout, a feat she figured out within seconds of having the first drops squeezed onto her tongue and realizing that sweet yogurty goodness was inside that thing.
The Yummi Pouches claim to be dishwasher safe, but I’m not sure I trust my dishwasher to hold it open enough to get clean. So, I’ve been washing them by hand using a bottle brush, and drying them on my bottle rack. Works fine. One tip I did read in one of the reviews: the lids are easy to lose, but are the same diameter as the disposable baby food pouches, so if you use those, just save the lids in case you lose the lids to your pouches. I’ve tried the lids from a GoGoSqueez applesauce pouch and they worked just fine!
Overall, my newfound yogurt-making hobby is saving me money– a 32 oz. container of Stonyfield Farm plain whole milk yogurt costs me $4ish, while an entire gallon of milk, which yields 64 oz. of yogurt, costs the same. So the homemade is literally half the price, with none of the trash of the packaging. And since I also mix it with fruit purees, we can compare the cost to the YoBaby yogurt, which would be almost $11 for the amount a gallon of milk yields in homemade yogurt! Maybe I’m not as crazy as I once thought my yogurt-making friend was!
I admit it. I was initially resistant to Pinterest. Why do I need one more social network? was generally my perspective. But then I tried it and quickly became hooked. Finally, my folders upon folders of bookmarked recipes were actually useful, because instead of scrolling through filenames, I could browse photographs on a “board” to choose what I wanted to cook, the same way I flip through a cookbook or magazine looking at the pictures. As a sewer and crafter, I could collect inspiration to use later, too, like yellow dresses that became my the spirit of my first yellow sundress that I made for myself. Much as I love Instagram for giving me a greater eye for beauty, Pinterest has helped me see all the world as a source of inspiration for making my spaces and meals a more beautiful place. For every critique I see of Pinterest as a place of envy and lust, I would argue that it’s what you make of it. If you collect pins and follow pinners who only share things you’ll never have, sure, you could easily get down and jealous and start to feel inadequate. But if you follow people with a similar vision for life and the world, you’ll never cease to be inspired. Because I judiciously unfollow thinspiration boards and mostly follow people who pin yummy food and quirky outfits and cute spaces, Pinterest has become a Happy Place for me.
But we can make it better.
Let’s face it, Pinterest’s search kind of sucks. But it’s because of us. Pinterest can only return pins to us if they’re captioned with the kinds of terms we use in our search. If I’m searching for pictures of foxes (which I often do because I’m obsessed and want a pet one), but everyone has captioned their fox pictures “CUTE!”, I’m not going to get many results. For a picture of a fox to show up in the results of my search with the keyword “fox,” the word “fox” needs to appear in the caption. Similarly, if I’m searching for images of toddler bedrooms or shared bedrooms to inspire me in sprucing up the gals’ nursery, only pictures captioned with words like “toddler room,” “shared room,” “twin room,” and “bunk beds” are going to return me the kinds of images I’m looking for, while the ones captioned “cute room!” or “idea for later!” are never going to reach my screen.
So, we have to start doing better. We have to start captioning our pins with actual descriptions of the image. Most people already do this with pins of recipes, captioning them with the name of the actual dish. But we need to do it with everything. I need to do it too. Also: did you know Pinterest has been tagified? Much like on Twitter, where placing a hashtag before a keyword turns the word itself into a clickable search that takes you to a page with all other posts that share that tag, putting “#coconut” on a pin for say, coconut rice turns the word #coconut into an instant search for other pins that share that tag. Click that link and see what I mean.
Here’s an example from one of my own pins. The bad pin has just a space instead of a useful caption, while the good pin has a descriptive caption that makes use of keywords and hashtags.
This is my pledge: In order to make Pinterest more useful to us all, I will henceforth caption all of my pins appropriately, describing what is in the image or the content of the blog post the image links to, and making use of related hashtags to make my pins more search-friendly. Will you pledge to do the same?
It’s been months since I posted. It turns out life with twins as a grad student is a little busy, and then you add in the holidays, and you end up with a bit of a hiatus. I also think I’ve sort of been stuck in this rut where, unless a post is some sort of profound meditation on life and parenthood and whatnot, I don’t post it, and frankly, inspiration isn’t easy to find for the sleep deprived whose days are an endless cycle of feeding, changing, snuggling, and playing with babies. So, I’m going to try to get back into posting with less pressure on myself for every post to be some sort of major epiphany.
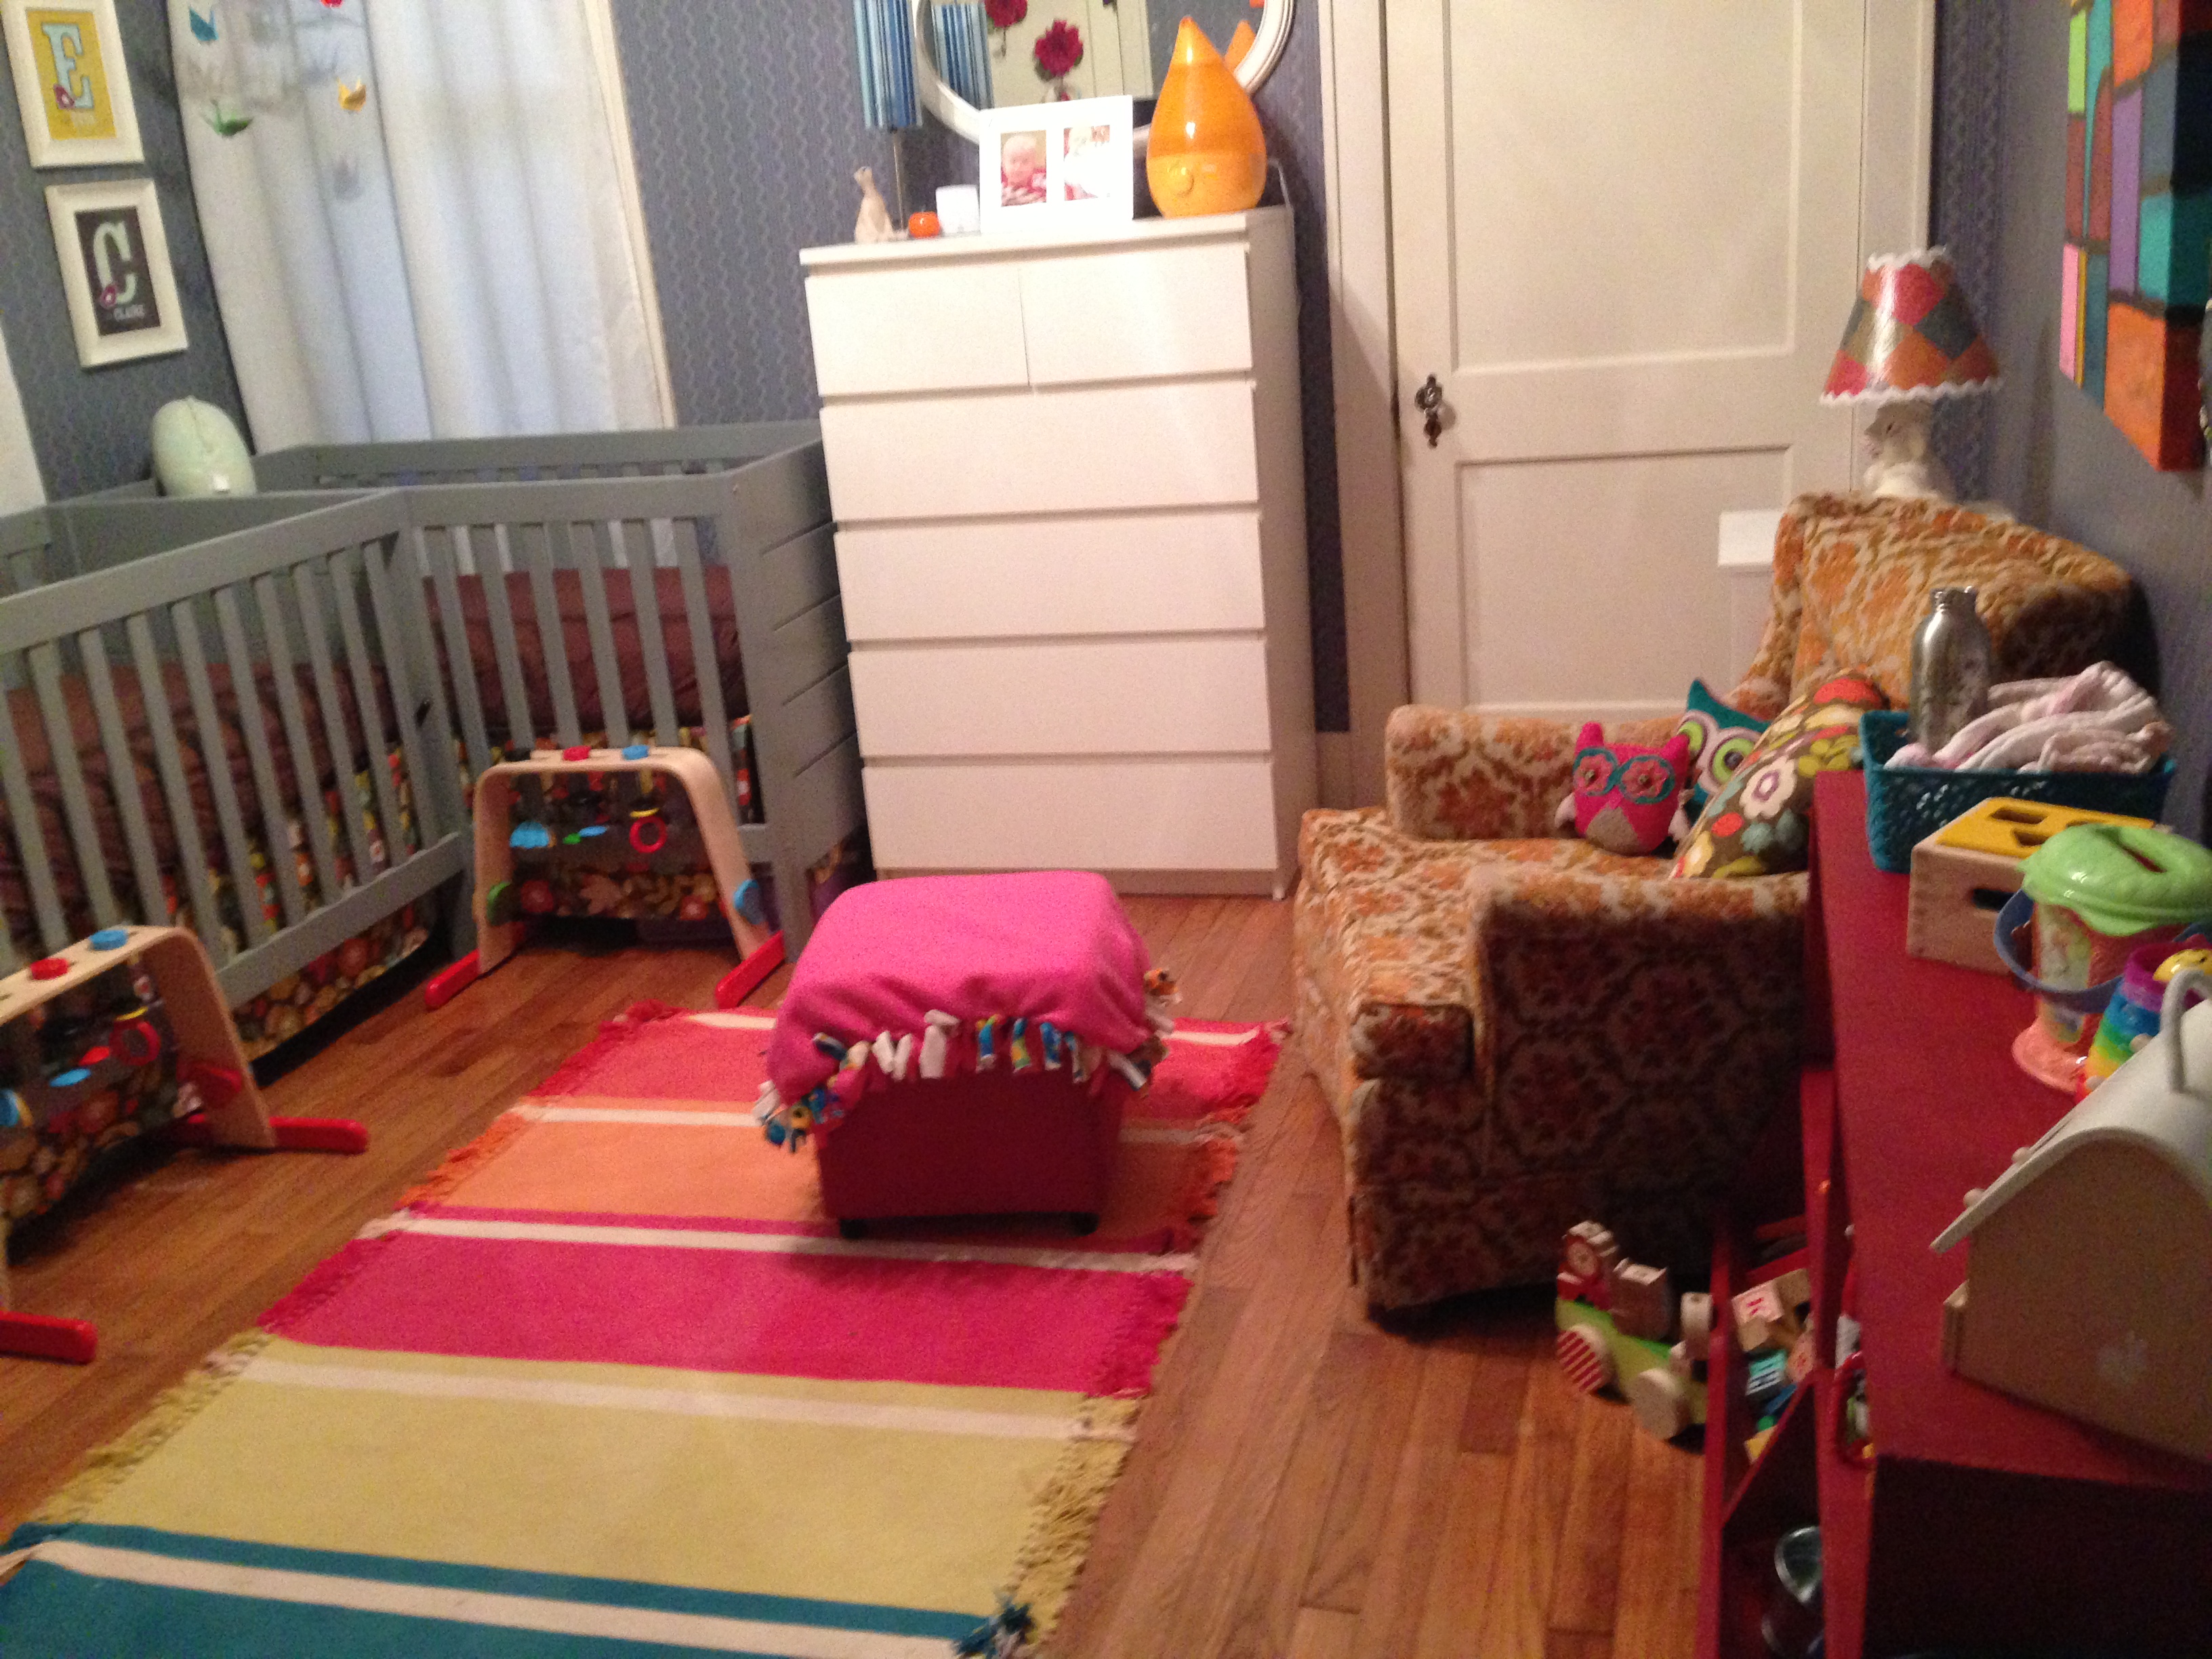
I figured I’d start with showing you the girls’ room lately, which has gone from a baby space to a space that better functions as a twin toddlers’ room. We’ve changed it around a lot to meet their needs as they are now very nearly ten months old. I know. Two months away from ONE YEAR. It’s insanity how the time has both crept and flown. (You can find the original nursery reveal here.)
I wanted the girls’ room to be more of a play space as they are now starting to be mobile and into everything, and I wanted them to have a safe space to explore. They got a lot of awesome toys from friends and family for Christmas, so we desperately needed some toy storage. Luckily, my husband is a super handy guy, and he built something amazing after seeing a few of my ideas on Pinterest.
To make space, we took out the futon and put in a secondhand chair. I will say, I am SO GLAD we had the futon for the first 8 months. Just to be able to lie down in there, or to rest the babies on either side of me in Boppies and feed both at the same time, was wonderful. I highly recommend a bed or couch in a nursery.
Anyway, here’s the space now, with before and afters for comparison.
Then:
Now:
Then:
Now:
Here’s a closeup of the new toy storage, built by my awesome husband!
The girls can crawl right up and grab blocks and toys out of the bottom bins, and if they’re sitting up, they can reach the shelf. As soon as they’re pulling up, it will be even more accessible. It was important to me that the toys be in view so they could easily see their options and get them for themselves. I had a feeling this would work better than a box or bin, because stuff on the bottom of a bin would be forgotten and never played with.
Then:
Now:
Here you can see the bucket we got to store stuffed animals, as well as one of my favorite things in the entire room, the canvas with the Vonnegut quote. It was a gift from a friend I met through Twitter, a “you survived” gift after all I went through getting the gals into the world. It is from a story in which a character is delivering a baptismal speech for twins, so it’s super apt. It says, “Hello babies. Welcome to Earth. It’s hot in the summer and cold in the winter. It’s round and wet and crowded. On the outside, babies, you’ve got a hundred years here. There’s only one rule that I know of, babies– You’ve got to be kind.” I think it’s a great rule.
Overall, the girls have the best-decorated room in our house, and we still haven’t bought a single new piece of furniture beyond the cribs, which were a gift from their grandparents. As I type, the girls are playing in the floor and I’m sitting in the chair.
We’ve been having a rough time with fussy Etta lately. When she is happy, she is very very happy, but when she is bad, she is horrid. After a few nights in a row, I was looking for solutions. She loves to be bounced, HARD, in her bouncy seat. And she loves to be swaddled tightly. But those two things can’t be combined very easily, because the swaddle gets in the way of the seat’s straps.
Enter inspiration. I knew there were folks who make “swaddle straps;” I just didn’t want to pay for a baby straight jacket that seemed simple enough to sew myself. But then, I got an even easier idea: why not just cut the swaddle part of an outgrown sleep sack? A little quick cutting, and I had my very own swaddle strap. It worked great, and it was certainly put to the test last night– Etta was up 3 times instead of her usual 1. The problem wasn’t the swaddle strap so much as that she seems to believe she must be bounced at all times, and, well, I want my sleep. Still, I’ll take drowsy bouncing over unswaddled screaming any day.
Pissy baby knows she’s about to be defeated.And she’s zonked. Just do. not. ever. stop. bouncing.
Baby bedding is a weird racket. Most of the cute stuff seems to come in sets, but the sets include things that may or may not kill your baby in her sleep, like crib bumpers. And they’re awfully matchy-matchy, as if you need curtains, sheet, bumpers, quilt, and skirt to all be perfectly matched. Personally, I prefer things that “go” rather than match. And the matching sets are often SO babyish, completely unable to grow up with a kid into early childhood. My goal with the twins’ room has been to have a room that is girly but not princess pink, to choose things that they won’t grow out of before they’re potty trained, and to use as many unique, handmade touches as possible. So I decided to make my own crib skirts. I think they turned out great:
I initially followed a pattern for the first skirt, found parts of it confusing, redundant, or unnecessary, and decided to simplify the process for the second skirt. I figured other folks might be interested in a super easy tutorial of my method for making a modern crib skirt, so here it is: how to make a modern crib skirt. There are no gathers, no pleats, noting complicated. If you can cut and sew a straight line, you can do this, I promise. Also, I took the trouble to make this skirt with French seams, encasing all the edges of the fabric, so a serger is not necessary for keeping your crib skirt from raveling in the wash. It should be sturdy enough to last for years.
Materials:
For the “deck” or the part that goes under the mattress, you need 1 5/8 yards (44″ or 54″ wide) muslin or other cheap fabric. (I got solid cotton that was on sale for $1.99/yd– no one will see this part)
For the skirt, 3 yards (44″ or 54″ wide) mid-weight fabric (I used a cotton duck that feels like canvas and claims to be soil resistant)
How To:
Cut out your pieces from the fabric:
For the deck, cut from the muslin a rectangular panel 29″ wide and 53″ long
For the skirt, cut 6 panels, each 30″ wide by 16.5″ long
Create a hem in each skirt panel by folding up one of the long sides 1/2″ and pressing, and then folding that up again and pressing:
Sew along the upper edge of the fold, making sure to backstitch at the beginning and end of each hem:
Create a similar hem on the two short sides of each skirt panel by folding and pressing 1/2″, folding that up and pressing again, and sewing close to the inner edge of the folded portion. It may help to pin the corners where the fabric is bulky because of the bottom hem:
After you have hemmed the bottom and sides of each skirt panel, fold the deck lengthwise and gently press a crease down the center:
(Can you sort of see the crease in that picture? It’s basically just there to help you find the center of the short ends of the deck.)
Line up the center of one skirt panel with the center of the deck, right sides of each facing OUT. Pin. (The right side of my deck fabric was hard to see, as it was a solid, so you might want to use a disappearing ink pen to mark “right” on the right side of your deck fabric.)
Sew the two pieces together, sewing very close to the edge:
Press seam open:
Fold over, encasing the edge of the first seam within the fold. Press:
Stitch seam again, sewing close to the edge:
Press seam again, and you’re left with a nicely enclosed edge that won’t fray in the wash:
Repeat process to sew panel to other short end of deck.
Starting at one edge, line up the corner of one skirt piece with the corner of one long side of the deck, again both right sides facing OUT. Pin in place along edge:
(using a grapefruit to keep your fabric from sliding off your table is clearly optional but works great!)
Match the corner of another skirt panel up with the other end of this side of the deck and pin in place. The two panels will overlap in the center:
As with the short sides, sew very close to the edge, press seam open, fold over to enclose cut edges, and stitch again to create a French seam. Repeat on other side of the deck with the last two remaining skirt panels.
Iron out any creases your fabric has gotten throughout the process, and you’re FINISHED! Put your crib skirt on your crib and admire your handiwork:
Note: the skirt will not graze the floor when mattress is raised to the highest newborn position, but should fit nicely for all of the various mattress positions you’ll use as your baby grows.
If you make a crib skirt, I’d love to hear how it goes!
Are you ready for more of my baby room crafty craziness? Here it comes!
Origami has long been a hobby of mine, at least since high school. I find it repetitive, mindless, and relaxing, a great project to do with my hands while I watch TV. One year, while unemployed, I made a ton of origami Christmas ornaments, and was sure glad to have them as unbreakable ornaments this year when I first encountered the combo of Tinycat+Christmas tree. I knew I wanted to do something origami-related for Etta and Claire’s room, and after my success making an origami crane-covered lampshade for my friend Naomi, I decided to DIY another origami crane lamp. Consider this a bit of an origami crane lamp tutorial.
First: you need a LOT of origami cranes. Obviously this varies depending on lampshade size, but I’d say at least 200, maybe more. (If you don’t know how to fold a crane, I highly recommend YouTube. It’s so much easier when you can watch someone’s hands actually folding instead of trying to decipher diagrams.)
A lot of evenings were spent in the recliner with Tinycat folding cranes. He wasn't very helpful, but he sure is snuggly!I folded enough cranes to fill this bag, then got started and realized I needed about 50 more. This is why it's helpful to have more paper than you use, so if you fold more, they'll still match the rest of the group.Then, hot-glue the cranes to your lamp all haphazard like.
I’m really proud of how the lamp turned out, and particularly in love with the cute turquoise base we scored on sale at Target for about $20. Here’s what it looks like in the girls’ room:
In the end, I actually had some cranes left, so I started thinking about what I could do with them and realized they’d be perfect for a mobile. I bought some small grapevine wreaths from Hobby Lobby for $4 each to use as the base of the mobile, and picked up a $3 spool of crochet thread to string the cranes on. Other than that, I already had ribbon, cranes, and beads, so this ended up a very cheap project! I learned while making crane ornaments that a bead under the cranes keeps the knots in the string from pulling through the fragile paper, and I used a large needle to string the cranes onto the thread. I’m really proud of my finished mobiles and can’t wait to see them hanging over the cribs! (That will be a project for Jon. I have a feeling I should avoid ladders.)
Just for the heck of it, I decided to see if anyone on Etsy was selling anything similar. I told Jon, “I bet people would pay $30 for these!” Sure enough, the one origami crane mobile seller I found was selling hers for $28 apiece, and they didn’t even have cute nests/wreaths, just plain old hoops! Not bad for something made largely of things I already had!
To me, one of the more fun things about being pregnant is fixing up a room for the babies. I knew from the start I wanted to avoid having a “theme.” None of the rest of my rooms have a theme, so why should the babies’ room look any different? I wanted their room to look like it belonged with the rest of the house, and I knew I had to work with the navy blue floral wallpaper that we renters can’t change. So my goal was to incorporate lots of color and lots of handmade touches to make a room that goes with the rest of our house. I figured I’d share some of my progress so far:
The cribs are actually the only “new” thing in the photo, and they’re BabyMod from Walmart. Cribs were a tough decision for me, because I originally really wanted bright red cribs, which apparently do not exist. Then I thought I’d paint unpainted cribs, which also do not exist, unless I want to pay a zillion dollars or drive 4 hours to the nearest IKEA, which, it turns out, didn’t have the unpainted ones in stock anyway. So we ended up with gray cribs that actually blend surprisingly well with the aforementioned wallpaper. The dresser we already had, and there are three smaller nightstands in the room that we also already had. Even the rug was something we already had.
Early on, I decided moving our futon into the babies’ room made more sense than getting a glider, because this way, I could set the babies down on the couch, sit down in between them, and still feed them even if I were home alone. Also, the futon still functions as a place for guests to sleep, in case anyone wants to stay in a house of craziness, or for one of us to sleep in the room with the babies. It’s actually an espresso brown, I just have a sheet on it to protect it from Tinycat’s hair, since he likes to hang out in there.
To go on the futon, I made 4 throw pillow covers with fabric I happened to already have in my stash, that I think goes well with the rug:
And for Christmas, my dad made these four paintings to go on the wall: I think the animals are super cute, and he did a great job choosing colors that go with the other things in the room.
Now, while we’re not doing an animal theme, there will be some other animal touches, including some letterpress prints I already had around, and a vintage lamp my stepmom found at a flea market:
I immediately loved the little elephant, but knew I wanted to do something to spruce up his bland, faded shade. Initially, I thought of trying to cover the shade with the same fabric as the throw pillows, but since I’m making the girls an origami crane lamp like the one I made for my friend, I decided to incorporate the same origami paper I’m using for the cranes to make the two lamps “go” together. I cut each sheet of origami paper into 4 smaller squares and ModPodged them to the lampshade in a patchwork pattern. Then I glued some rickrack trim around the edges. I’m really proud of the results (though everything I ModPodge comes out a little wrinkly), and think the patterns of the paper echo the pattern of the wallpaper in a nice way:
I still need to figure out some sort of changing table/dresser, want to get an ottoman, need to hem curtains, and am planning to sew some crib skirts, among other things, but I’m pretty proud of how the babies’ room is looking so far. I don’t think it screams “baby” or “pretty pretty princess” but it’s still girly and fun and colorful. I can’t wait to get it finished!


 I admit it. I was initially resistant to Pinterest. Why do I need one more social network? was generally my perspective. But then I tried it and quickly became hooked. Finally, my folders upon folders of bookmarked recipes were actually useful, because instead of scrolling through filenames, I could browse photographs on a “board” to choose what I wanted to cook, the same way I flip through a cookbook or magazine looking at the pictures. As a sewer and crafter, I could collect inspiration to use later, too, like yellow dresses that became my the spirit of my first yellow